Shiplap is a woodcut in the shape of long vertical and horizontal strips. Many people use it to add a traditional wood look to their bathroom.
Can You Put Shiplap in a Bathroom with a Shower? You can use PVC shiplap in the bathroom with a shower and use a high-quality sealant to avoid damage due to moisture. In addition, you can protect it from moisture and pests by using water and mildew-resistant paint or stain. This material is easy to install and durable and can make your bathroom look good.
It is more flexible than solid wood because it can resist climate change and different weather conditions and adjust quickly to the wall if you install it nicely.
Why would you use shiplap in a bathroom with a shower?
Many people spend hours in the bathroom, preparing themselves for work or any outdoor meeting. Thus, you can make it bright, clear, and elegant by installing a shiplap in it.
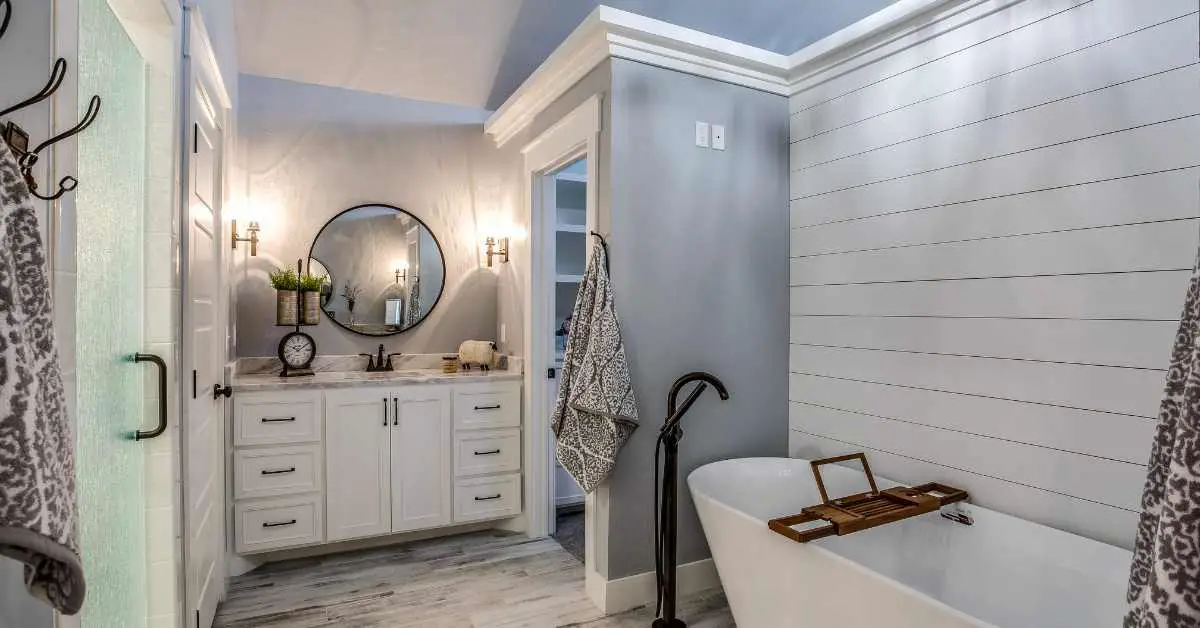
Enhance the look
Modern houses and bathrooms require an aesthetic and antique look for their walls and ceilings. The home decorators are now recommending adding shiplap planks in your place to enhance the interior.
You can put it on the walls to make your bathroom look good. Putting stylish light fixtures or wall lamps on its planks provides a classy and luxurious look.
Sleek and elegant hanging pendants hanging on these walls make it look sophisticated and trendy. In addition, you can use vertical planks to make your place look bigger if your ceiling is low.
Variety of styles and colors
There are varieties of options that you can choose for it depending on the style you want to set up for your place.
For example, you can paint it white to provide a clear and neat look, but you can also paint it with any desired color to match your vanity and walls.
You can leave it with its original wood color to add a rustic and traditional look. You can do it in another way if you want to paint the planks black or white by using sandpaper and maintaining the original rustic appearance.
You can put it on the ceiling of your bathroom to elevate the whole texture, but a good satin is required to maintain the shine and wood from moisture. The pine wood planks are strong and resistant to warping in a damp environment.
Easy to install and repair
It is easy to install as you can do it yourself with easy steps. You do not need to hire any professional to install it at any place in your house, but it will take some hard work and time to install it properly.
You can repair any damage to its planks by yourself if you have some necessary tools like nails, a hammer, extra wood blocks or planks, and a circular saw.
Unlike tile walls or vinyl wall covering, it does not need a professional to install and repair if damaged.
Durable and affordable
They are made of organic materials, therefore, are resistant to rust, corrosion, and variation in temperature.
In addition, these planks are thicker and have hardwood used in their manufacturing which causes an increase in durability.
It is affordable if you are planning to renovate your bathroom within a restricted budget. It ranges from $2-$8 per square foot, and you can cover a 10-by-10 foot place within less than$1100-$1300.
It also depends on the type of wood and material you are going to choose for your place, as the range can vary for different types of shiplap wood.
Why do some people avoid using shiplap in the bathroom with a shower?
Some people avoid using it in their bathrooms because it is the most humid place in the house. It is a type of wood covering on the walls that can warp or twist when exposed to high moisture.
It can get mold and mildew in a damp environment and creates problems for you to change or remove it.
Also, Shiplap in the shower area gets water splashes more often than the other bathroom areas, which causes more chances of wood to absorb water.
These wood planks have invisible pores which soak water from the environment and cause wood cupping or cracks.
People mostly have MDF wall coverings that are not water-resistant and penetrate more water through the pores, causing warping.
Its life reduces from time to time when put in a damp atmosphere, especially the area that surrounds the shower.
In addition, the slight gap between the planks accumulates dust and debris, which cause the covering to look dirty.
How do you protect shiplap in a bathroom with a shower?
It requires special attention and care when you install it in a damp or humid place to reduce the risk of cupping and cracking.
Therefore, it is better to have a waterproof shiplap in the area to prevent any damage. Polyvinyl chloride shiplap is the best option to put in the shower because it is waterproof.
PVC is water, mold, and corrosion resistant and works amazingly well in an area with high humidity.
In addition, it is lightweight, and you can apply a good quality moisture-resistant stain on its surface to make it more protected and durable.
You can also apply a fine coat of high-quality sealant to add an extra layer of protection against moisture.
Sealing the seams between the planks is better to avoid any dust and water splashes into the gaps.
I recommend you choose good quality wood and ensure proper ventilation to keep the humidity level as low as possible.
Wood is attractive to pests and bugs, so you can coat a layer of mildew-resistant paint on its surface to control the pests, mildew, and mold.
It can also reduce the moisture absorption into the wood and make it safer to use in the shower surrounding area.
How do you install a shiplap in a bathroom?
Proper installation is necessary to reduce the risk of water absorption and mildew development in the seams and gaps between the planks.
You need a primer, paint, paintbrush, nails, shiplap, nail gun, caulk, sandpaper, and air compressor.
Apply the primer on the wood to seal the pores and make the surface even if you want to paint it white. You can paint the wood before installation and let it dry for some time.
It is better to install the baseboard first because this material is not thick, and level it properly to adjust the planks over it.
Use the nail gun to attach the ends of the baseboard to the wall. Do not use any glue to attach the boards to the wall, but you can use nails of 4-5 cm in length.
You can get the planks that are cut according to your measurements, and you can also cut them to adjust around the corners and pipes.
You can add the planks from the base or top and nail them using a nail gun on the marked places or into the studs.
Make sure to fill the seams and gaps with caulk to prevent pests and humidity into the wood, especially in the shower and toilet area.
You can use a painted caulk to cover the imperfections and ensure that you trim the corner to give a fine look.
Lastly, apply a paintbrush and one final coat of good moisture or mildew-resistant paint on the planks to add a polished and finishing look.
Related Articles: