Bathroom fans are necessary for proper ventilation and air circulation in this place, according to the building codes. They can prevent different moisture and condensation problems.
How to Seal Around Bathroom Exhaust Fan? You can seal around the bathroom exhaust fan by measuring the correct opening of the fan, access the gaps, indoor sealing, outdoor vent gaps sealing, check the housing box leakage, and install the dampers. You can use different materials, such as caulk and filler foam, metal tape, and sealing putty to seal the air leakage around the fan.
Its proper installation is essential to avoid any damage and air leakage around the walls and ceiling.
Therefore, it is better to seal the leakage around it using suitable sealants or hire a professional to inspect the air leakage and working of the fan.
How can you seal around the bathroom exhaust fan?
You can seal the area around the exhaust fan by following these steps without any damage.
Correct opening for the fan
Improper installation and location cause air leakage, and the best place to install this vent is on the roof or the wall.
The hole or cut in the wall or roof must have the same size as the fan to minimize the air space around it.
It is better to understand the wall type before cutting the correct opening for the exhaust fan and measuring its exact size.
Different brands have different shapes, curves, and edges, and appropriate tools are necessary to cut the hole in the wall according to its size and shape.
A correct opening minimizes the chances of air leakage around it because the incorrect cuts cannot fit it properly, and you have to fill more gaps while sealing.
You can hire professional electricians to install the fan, as they have more experience and understanding of the accurate opening for the venting system.
Check for the gaps
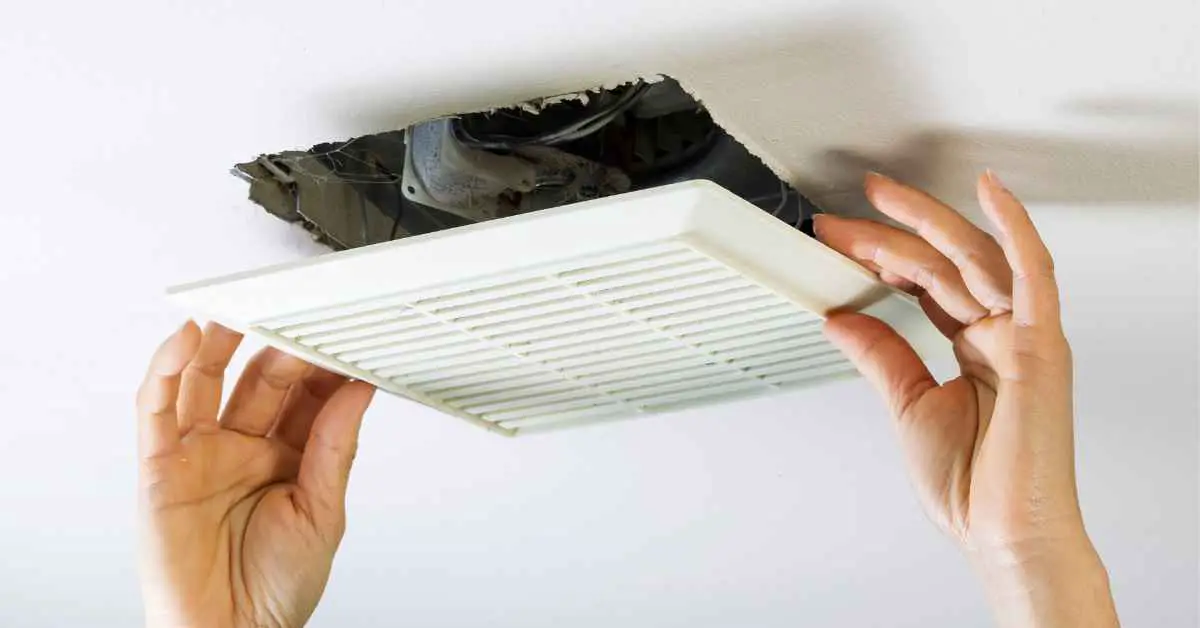
The next step is to install the fan in the wall hole and check for the gaps around the exhaust fan.
Align its housing correctly, and link it with the exterior vent and make all the necessary connections.
Inspect the gaps from the interior and exterior to the vent, and ensure to fit it in the cut appropriately to avoid the gaps as little as possible.
It is better to leave the installation task and electricity connection to the professional electricians than do it yourself because the chances of air leakage will be less if a professional is hired.
Indoor sealing
You can use different materials to seal the air leakage around the indoor venting system.
For example, a caulk gun can do excellent work to fill the small gaps, while you can use filler foam to fill the bigger openings.
Sealing the gaps is a simple and easy task if you have experience and knowledge about the correct sealant and tool to fill these gaps.
It is better to select the caulk gun with a smooth pressure rod so that you do not need to apply much pressure while applying the caulk.
You can apply the caulk on the openings and gaps with a caulk gun and ensure that all the holes are sealed correctly and that there is no air leakage around the fan.
Seal Outdoor vent gaps
Cut a hole outside the wall to install the vents, and there are chances of air leakage from the gaps on the exterior wall.
Therefore, it is important to seal these openings from the outside.
You can use the insulating material if the openings are bigger. Otherwise, the caulk gun can do well on the smaller gaps and seal them completely to avoid air leakage.
Use the same process for sealing the indoor gaps, and inspect all the parts if they are damaged.
Check the fan housing box
Sometimes, the air leakages are not around the walls and gaps, but the housing designs have leakage problems.
The leakages in the housing are difficult to detect and can cause an increase in energy bills, as more air can leak through the defects in the housing box.
You can cover the housing box and all the edges of the box and insulate it with an appropriate insulating material, such as plywood.
You can create a box with insulating material and put the housing in it, and make sure to make an opening or hole for the vet duct.
Install dampers
It is better to install the dampers to prevent air leakage and back drafting inside the exhaust fan due to the negative air flowing back into the bathroom.
You can install different types of dampers, and most HVAC systems come with different dampers, such as safety dampers, back draft dampers, control dampers, and balancing dampers.
They can control the airflow and the dust particles entering from outside. You can read the instruction to install the damper and seal the air leakages correctly.
Why would you seal around the bathroom exhaust fan?
Sealing around the bathroom fan is important because it can decrease energy consumption and electricity bills.
It also prevents the airflow between the bathroom and attic through the exhaust fan.
The openings and gaps around the walls can cause the pest to breed there, and the infestation can become severe over time if you do not seal the joints or holes.
Dust and debris can enter through these openings and affect its performance because the dust particles can cause the motor to stop working when the grime layer is thick on the components.
You may need to clean this place more often due to the dust entering the bathroom through these gaps and air leakages.
The moisture can cause mold and mildew growth in the gaps, which influences its performance; therefore, it is better to seal the openings and holes.
What materials can you use to seal around the bathroom exhaust fan?
You can use different materials and techniques to seal the area around the exhaust fan.
Caulk and filler foam
You can use caulk to seal the openings and small holes around the walls and ceilings. Different types of caulk can create waterproof and air-tight sealing around the walls.
Latex caulk is one of the best to fill small gaps and joints, which can last long and prevent pest infestation in the holes.
Using filler foam is an efficient and durable technique to seal the bigger openings that cannot be filled with a caulking gun, and it can prevent air leakage and other problems by sealing the joints and holes.
Metal tape
The flat metal tape with a coating of adhesive material is used to seal the holes and gaps around the fans, windows, and other fixtures.
You can use it to secure the vent ducts, joints, and other connections because it features protection against moisture and mold development.
It is made of iron, copper, lead, and stainless steel with a coating layer of adhesive and can withstand chemicals and heat.
Sealing putty
Sealing putty uses the process of mixing chalk and linseed oil and is a high-plasticity material similar to the dough, which is used as a filler or sealant to cover the gaps and openings at different locations.
It quickly seals the gaps when dry and can last longer under different conditions.
Different putties are available in the market for different purposes and can help with air and water leakage problems.
Related Articles: