Installing tiles in the bathroom when renovating the interior or after constructing a new bathroom is one most important tasks to add beauty and decorative appearance to this place.
How to Measure Bathroom Size For Tiles? You can measure the bathroom size for tiles by collecting all necessary tools, determining the bathroom shape, and measuring the rectangular, square, and round floor sizes. Calculating the wall size, the number of tiles, and an overage percentage are also essential for correct measurements.
The correct measurement of the floor and walls while installing the tile is essential because incorrect measurements cause poor installation. In addition, you have to rush to the market to select more tiles for this area, and you may not find the same texture and design again.
How can you measure bathroom size for tiles?
You can measure the different bathroom areas and select the number of tiles for this place by following measurements.
Collect all necessary tools
First of all, gather all the necessary tools and equipment for measuring the bathroom size to prevent any difficulty while calculating the floor and wall area.
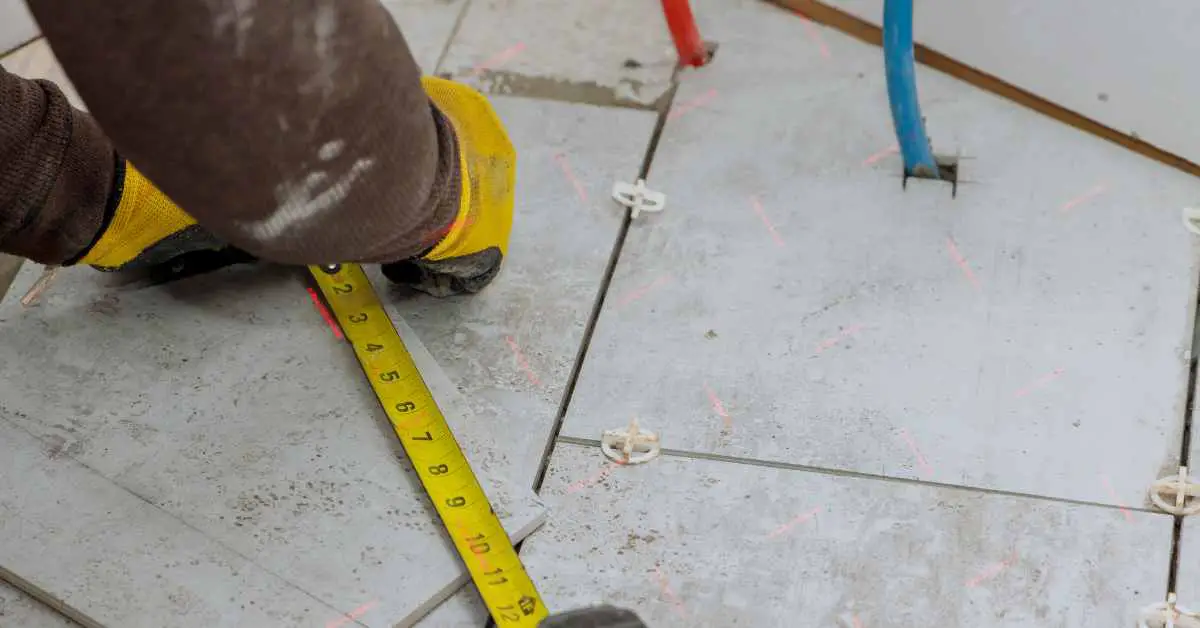
Take a pencil, a marker, measuring tape, a calculator, and a notepad. It is better to take a measuring tape with a metal end of one inch to get accurate and easy measurements.
Start calculating the floor and the wall sizes where you want to install the tiles when you have gathered all the essential tools for this task.
Determine the bathroom shape
Clear the floor by removing all furniture items and plants, and also clear the removable fixtures, such as paintings, wall hangings, and curtains, before starting the process.
Now, determine the bathroom shape, such as if the floor space is square, rectangular, or round, to measure its size correctly. Make sure to keep the measuring tape straight without bending it around an obstruction in the way.
You can also consult a professional to measure the bathroom size accurately and avoid calculation errors.
Measurement for rectangular floor
You can start measuring the floor after determining the exact shape, such as the calculations are simple if you have a rectangular floor.
Stretch the measuring tape and measure the floor length and width accurately. Now multiply these values and divide the calculated value by 144 to convert it into square feet.
For example, suppose the length of a rectangular shape bathroom is 8 feet 7 inches, and the width is 5 feet 5 inches.
Convert these values into inches, as it becomes 103 inches in length and 65 inches in width, and multiply these two values, which gives the total value of 6695 inches (103×65 = 6695).
Divide this total calculated area value by 144, such as 6695/144, and you get 46.49 square feet of coverage for tiles on the rectangular bathroom floor.
Measurements for square floor
Measuring the square bathroom floor is much easy than other shape floors because the square floor will have equal length and width. You can use the same procedure, as mentioned above, for the rectangular floors to calculate the square floor size.
Let’s say the floor has a 10-foot length and 10-foot width. Multiply this length and width after converting the values in inches, such as 120×120 inches (120×120 = 14,400). Divide the calculated value by 144 to get the total value in square feet, which is 100 square feet coverage (14,400/144 = 100).
There is another way to measure the square floor; for example, you have a 12×12 foot area. Multiply it as 12×12 ft to get the total square feet coverage.
Measurements for the round floor
You can measure the round shape bathroom floor by measuring the total floor length and dividing it by 2 to get the radius. Multiply the calculated radius with 3.14 or pi and round off to the nearest number for easy calculations.
I measured the floor length, which is 22 feet, and divided this value by 2 to get the radius of this round shape floor, which is 11 feet. Then, I converted the value in inches, such as 132 inches, and multiple it by 3.14, which gives the total coverage of 414 square feet (132×3.14 = 414).
Measure the wall for tiling
It is a little tricky to measure the accurate wall size for tiling it because the walls in the bathroom include windows, doors, and cabinets.
The walls in the bathroom are usually rectangular, and you can easily measure the length and width without much exertion.
Measure the length and width of the entire wall, including the doors and windows, and subtract their area from the calculated value afterward.
For example, I have measured the wall area as 34×28 inches, and the window area on this wall is 22×10 inches. Then, I subtracted the window area from the total calculated wall area to accurately estimate floor coverage.
Calculate the number of tiles
Calculating the required tiles needed for the measured floor and wall area is an essential step, and it is easy to convert the total coverage area into the number of tiles.
Calculate the tile size in square feet and divide the total floor area calculated above by the tile size to determine the number of tiles needed for this place.
I have selected a 7×7 inch tile and converted it into a square foot, such as 49/144, which is 0.34 square feet. Then, I multiplied this value by the total area calculated rectangular floor area above, that is 46.49/0.34, and rounded off to the nearest value. This calculation tells that I will need 137 tiles for my rectangular bathroom floor.
Another way to determine the number of tiles for the floor or wall is to check the square foot value of the tile box and divide the wall or floor area in the square foot with the value on the tile box.
For example, the tile size mentioned on the box is 11 square feet, and the calculated floor or wall area is 100 square feet. This means you will need nine tile boxes for this place, as 100/11=9.
Estimate the percentage overage
Estimating the percentage overage is the last and tricky step, as you have to select some extra tiles for the floor and walls to avoid the shortage during installation.
Professionals recommend an overage of 10 % for backsplash and walls with fewer edges. However, an overage percentage of 15% is ideal for a bathroom with many sharp edges and corners because the chances of tile wastage are more because of cutting around the corners.
You can estimate a 30% overage for large format tiles because they are more susceptible to cracks and breakage during installation. Therefore, it is better to select some extra quantity to avoid the stress of getting more tiles at the last moment when installing them.
Things to consider while measuring the bathroom size for tile
It is better to consider the following things while measuring the bathroom size for tiles because it can affect your measurements.
Tile size
Some tiles have a larger format while others have a small therefore consider the bathroom and the tile size when installing them in this place.
The large format tile is better for small bathroom areas because it can offer a spacious appearance to the overall space, while the small one will look well in large floor areas.
Do not count the area under the bathtub and toilet
It is better to not calculate or add the space under the bathtub or toilet when renovating the old bathroom floor because the tiles will not go under these plumbing fixtures.
However, you can count on this area if the plumbing fixtures are not installed, as the toilet can go on the tile floor for better stability.
Make sure to estimate a correct overage percentage, as the extra tiles will be of no use and can waste your money.
Select the best tile material to avoid cracks
Various tile materials are available in the market, and you can select them depending on the interior and your preference for decorating this place.
You can select a durable and strong material for installing on the bathroom floor because the floor tiles are more prone to damage or crack due to heavy plumbing fixtures and furniture products.
The low-quality and less durable material can get damaged when installing it on the floor or wall, wasting all your hard work and money.
Related Articles: